使用NiuParser进行分词及词性标注

1、下载并解压
http://www.niuparser.com/

2、语法

[USAGE]
         NiuParser-v1.3.0-mt-win.exe    <Action>        <OPTIONS>
[ACTION]
        --WS    :  Word Segmentation.
        --POS   :  Part-Of-Speech Tagging.
        --NER   :  Named Entity Recognition.
        --CHK   :  Chunking (shallow syntactic parsing).
        --CP    :  Constituent Parser.
        --DP    :  Dependency Parser.
        --SRL   :  Semantic Role Label.
[OPITION]
>>   Get Options of Word Segmentation
                 NiuParser-v1.3.0-mt-win.exe    --WS
>>   Get Options of POS Tagging
                 NiuParser-v1.3.0-mt-win.exe    --POS
>>   Get Options of Named Entity Recognition
                 NiuParser-v1.3.0-mt-win.exe    --NER
>>   Get Options of Base Phrase Chunking
                 NiuParser-v1.3.0-mt-win.exe    --CHK
>>   Get Options of Constituent Parser
                 NiuParser-v1.3.0-mt-win.exe    --CP
>>   Get Options of Dependency Parser
                 NiuParser-v1.3.0-mt-win.exe    --DP

3、测试例子
en.txt

Don't ever let somebody tell you you can't do something, not even me. 
You got a dream, you gotta protect it. 
People can’t do something themselves, they wanna tell you you can’t do it. 
If you want something, go get it. 
Period.

zh.txt

别让别人告诉你你成不了才,即使是我也不行。
如果你有梦想的话,就要去捍卫它。
那些一事无成的人想告诉你你也成不了大器。
如果你有理想的话,就要去努力实现。
就这样。

4、执行语句

NiuParser-v1.3.0-mt-win.exe --WS -c niuparser.config -in en.txt -out enws.txt
NiuParser-v1.3.0-mt-win.exe --POS -c niuparser.config -in enws.txt -out enpos.txt

NiuParser-v1.3.0-mt-win.exe --WS -c niuparser.config -in zh.txt -out zhws.txt
NiuParser-v1.3.0-mt-win.exe --POS -c niuparser.config -in zhws.txt -out zhpos.txt

5、测试结果
enpos.txt

Don't/NR ever/NN let/VV somebody/NR tell/NR you/NR you/NR can't/NN d/NN o/VV something/JJ ,/NN not/VV even/NR me./NN 
You/NR go/NN t/NN a/AD dream,/VV you/NR gotta/NR protect/NN it./NN 
People/NR can/NR ’/PU t/NN d/NN o/VV something/JJ t/NN hemselves/NN ,/PU the/DT y/NN wanna/NR tell/NR you/NR you/NR can/NR ’/PU t/NN do/VV it./NN 
If/NR you/NR want/VV something/JJ ,/NN go/NN get/VV it./NN 

zhpos.txt

别/AD 让/VV 别人/NN 告诉/VV 你/PN 你/PN 成/VV 不/AD 了/VV 才/AD ,/PU 即使/CS 是/VC 我/PN 也/AD 不/AD 行/VV 。/PU 
如果/CS 你/PN 有/VE 梦想/NN 的话/SP ,/PU 就/AD 要/VV 去/VV 捍卫/VV 它/PN 。/PU 
那些/DT 一事无成/CD 的/DEG 人/NN 想/VV 告诉/VV 你/PN 你/PN 也/AD 成/VV 不/AD 了/VV 大器/NN 。/PU 
如果/CS 你/PN 有/VE 理想/NN 的话/SP ,/PU 就/AD 要/VV 去/VV 努力/AD 实现/VV 。/PU 
使用THULANC进行分词及词性标注

1、首先到这里下载程序及模型
http://thulac.thunlp.org/

2、解压,我用的是java版本的程序

3、基本语法

java -jar THULAC_lite_java_run.jar [-t2s] [-seg_only] [-deli delimeter] [-user userword.txt] -input input_file -output output_file

其中:
-t2s                将句子从繁体转化为简体
-seg_only           只进行分词,不进行词性标注
-deli delimeter     设置词与词性间的分隔符,默认为下划线_
-filter             使用过滤器去除一些没有意义的词语,例如“可以”。
-user userword.txt  设置用户词典,用户词典中的词会被打上uw标签。词典中每一个词一行,UTF8编码(python版暂无)
-model_dir dir      设置模型文件所在文件夹,默认为models/
-input input_file   设置从文件读入,默认为命令行输入
-output output_file 设置输出到文件中,默认为命令行输出

4、测试例子
en.txt

Don't ever let somebody tell you you can't do something, not even me. 
You got a dream, you gotta protect it. 
People can’t do something themselves, they wanna tell you you can’t do it. 
If you want something, go get it. 
Period.

zh.txt

别让别人告诉你你成不了才,即使是我也不行。
如果你有梦想的话,就要去捍卫它。
那些一事无成的人想告诉你你也成不了大器。
如果你有理想的话,就要去努力实现。
就这样。

5、执行语句

java -jar THULAC_lite_java_run.jar -input en.txt -output enout.txt
java -jar THULAC_lite_java_run.jar -input zh.txt -output zhout.txt

6、测试结果
enout.txt

Don_n '_w t_g ever_nz let_x somebody_x tell_np you_np you_np can_np '_w t_g d_g o_v something_x ,_w not_np even_np me._np 
You_np got_np a_v dream_np ,_w you_np gotta_x protect_x it._x 
People_x can??_n t_g d_g o_v something_x themselves_x ,_w they_x wanna_n tell_np you_np you_np can??_n t_g do_v it._m 
If_v you_np want_x something_x ,_w go_v get_np it._m 
Period._x 

zhout.txt

别_d 让_v 别人_r 告诉_v 你你_r 成_v 不_d 了_v 才_n ,_w 即使_c 是_v 我_r 也_d 不行_a 。_w 
如果_c 你_r 有_v 梦想_n 的_u 话_n ,_w 就要_d 去_v 捍卫_v 它_r 。_w 
那些_r 一事无成_id 的_u 人_n 想_v 告诉_v 你你_r 也_d 成_v 不_d 了_v 大器_n 。_w 
如果_c 你_r 有_v 理想_n 的_u 话_n ,_w 就要_d 去_v 努力_a 实现_v 。_w 
就_d 这样_r 。_w 

使用NLTK进行分词及词性标注

1、首先是安装
1.1、安装Python 3.4
注意要用32位版本
http://www.python.org/downloads/

1.2、安装Numpy
注意两点,一是不一定所有版本都有windows安装包,二是要找支持python3.4的安装包
http://sourceforge.net/projects/numpy/files/NumPy/

1.3、安装NLTK
注意3.2版本有bug,不要用。
http://pypi.python.org/pypi/nltk

2、下载NLT Data
方法1:
在python中运行:

import nltk
nltk.download()

方法2:
到下面的地址,直接去找链接,然后自己下载解压
https://raw.githubusercontent.com/nltk/nltk_data/gh-pages/index.xml

3、进行分词
3.1、设置环境变量

set PYTHON_HOME=C:\NeoLanguages\Python34_x86
set PATH=%PYTHON_HOME%;%PATH%
set NLTK_DATA=D:\NLP\NLTK\nltk_data
@python

3.2、py文件

#!usr/bin/python

import nltk

#测试句子
sentence = "Don’t ever let somebody tell you you can’t do something, not even me. \
You got a dream, you gotta protect it. People can’t do something themselves, \
they wanna tell you you can’t do it. If you want something, go get it. Period."

#分词
tokens = nltk.word_tokenize(sentence)

#词性标注
tagged = nltk.pos_tag(tokens)

#句法分析
entities = nltk.chunk.ne_chunk(tagged)

3.3、逐句运行

D:\MyProjects\NLP\NLTK>python
Python 3.4.4 (v3.4.4:737efcadf5a6, Dec 20 2015, 19:28:18) [MSC v.1600 32 bit (In
tel)] on win32
Type "help", "copyright", "credits" or "license" for more information.
>>> import nltk
>>> sentence = "Don’t ever let somebody tell you you can’t do something, not e
ven me. \
... You got a dream, you gotta protect it. People can’t do something themselves
, \
... they wanna tell you you can’t do it. If you want something, go get it. Peri
od."
>>> tokens = nltk.word_tokenize(sentence)
>>> tagged = nltk.pos_tag(tokens)
>>> entities = nltk.chunk.ne_chunk(tagged)

>>> tokens
['Don’t', 'ever', 'let', 'somebody', 'tell', 'you', 'you', 'can’t', 'do', 'som
ething', ',', 'not', 'even', 'me', '.', 'You', 'got', 'a', 'dream', ',', 'you',
'got', 'ta', 'protect', 'it', '.', 'People', 'can’t', 'do', 'something', 'thems
elves', ',', 'they', 'wan', 'na', 'tell', 'you', 'you', 'can’t', 'do', 'it', '.
', 'If', 'you', 'want', 'something', ',', 'go', 'get', 'it', '.', 'Period', '.']

>>> tagged
[('Don’t', 'NNP'), ('ever', 'RB'), ('let', 'VB'), ('somebody', 'NN'), ('tell',
'VB'), ('you', 'PRP'), ('you', 'PRP'), ('can’t', 'VBP'), ('do', 'VB'), ('someth
ing', 'NN'), (',', ','), ('not', 'RB'), ('even', 'RB'), ('me', 'PRP'), ('.', '.'
), ('You', 'PRP'), ('got', 'VBD'), ('a', 'DT'), ('dream', 'NN'), (',', ','), ('y
ou', 'PRP'), ('got', 'VBD'), ('ta', 'JJ'), ('protect', 'NN'), ('it', 'PRP'), ('.
', '.'), ('People', 'NNS'), ('can’t', 'VBP'), ('do', 'VBP'), ('something', 'NN'
), ('themselves', 'PRP'), (',', ','), ('they', 'PRP'), ('wan', 'VBP'), ('na', 'T
O'), ('tell', 'VB'), ('you', 'PRP'), ('you', 'PRP'), ('can’t', 'VBP'), ('do', '
VB'), ('it', 'PRP'), ('.', '.'), ('If', 'IN'), ('you', 'PRP'), ('want', 'VBP'),
('something', 'NN'), (',', ','), ('go', 'VBP'), ('get', 'VB'), ('it', 'PRP'), ('
.', '.'), ('Period', 'NNP'), ('.', '.')]

>>> entities
Tree('S', [('Don’t', 'NNP'), ('ever', 'RB'), ('let', 'VB'), ('somebody', 'NN'),
 ('tell', 'VB'), ('you', 'PRP'), ('you', 'PRP'), ('can’t', 'VBP'), ('do', 'VB')
, ('something', 'NN'), (',', ','), ('not', 'RB'), ('even', 'RB'), ('me', 'PRP'),
 ('.', '.'), ('You', 'PRP'), ('got', 'VBD'), ('a', 'DT'), ('dream', 'NN'), (',',
 ','), ('you', 'PRP'), ('got', 'VBD'), ('ta', 'JJ'), ('protect', 'NN'), ('it', '
PRP'), ('.', '.'), ('People', 'NNS'), ('can’t', 'VBP'), ('do', 'VBP'), ('someth
ing', 'NN'), ('themselves', 'PRP'), (',', ','), ('they', 'PRP'), ('wan', 'VBP'),
 ('na', 'TO'), ('tell', 'VB'), ('you', 'PRP'), ('you', 'PRP'), ('can’t', 'VBP')
, ('do', 'VB'), ('it', 'PRP'), ('.', '.'), ('If', 'IN'), ('you', 'PRP'), ('want'
, 'VBP'), ('something', 'NN'), (',', ','), ('go', 'VBP'), ('get', 'VB'), ('it',
'PRP'), ('.', '.'), Tree('PERSON', [('Period', 'NNP')]), ('.', '.')])
>>>

SUN PKIX、AXIS2及C#在HTTPS认证方式的区别

最近尝试了用两级自签名证书来验证SUN PKIX、AXIS2及C#在HTTPS认证方式的区别。
两级证书为:
1、CA证书NMyCA1024
2、服务器证书serversigned

其中,AXIS2通过验证是最简单的,
1、服务端设置serversigned证书的Key Store
2、客户端设置NMyCA1024或serversigned的Trust Store
3、通过验证。

如果要SUN PKIX通过验证(Oracle的JDK/JRE自带)
1、那需要服务端设置serversigned证书的Key Store
2、客户端设置NMyCA1024或serversigned的Trust Store
3、客户端把NMyCA1024证书导入JDK或JRE的CA证书列表cacerts
4、通过验证。

如果要C#通过验证
1、那需要服务端设置serversigned证书的P12文件
2、客户端设置NMyCA1024或serversigned的Trust Store
3、客户端双击NMyCA1024证书导入IE的CA证书列表
4、通过验证。

Spring通过注解加载Bean的基本原理浅析(C#版)

这第一篇,同样讲的是spring的IOC功能,是如何实现通过注解来加载Bean文件的。
这是java版本的姐妹篇,C#版本。

文章原创,转载请注明出处www.neohope.com

经过无限精简之后,整体流程为:
1、初始化bean工厂
bean工厂根据配置,加载带有指定attribute的类,并放到了Dictionary中
2、从bean工厂获取一个bean
通过bean的id,实例化一个类,并返回

需要的前置知识为:
1、spring的基本知识
2、反射

然后是源码:
1、TestAttribute.cs
这是个Attribute类,声明了一个新的注解类型,用于表示bean及bean的名字

using System;
using System.Collections.Generic;
using System.Linq;
using System.Text;

namespace TestAttribute
{
    [AttributeUsage(AttributeTargets.Class)]
    class TestAttribute : System.Attribute
    {
        public String Ntype { get; set; }
        public String Nname { get; set; }
        public String Nauthor { get; set; }
        public String Nversion { get; set; }
        public String Nmsg { get; set; }
    }
}

2、TestBean.cs
这是个Bean,使用了Attribute作为标识,是用于具体加载的类

using System;
using System.Collections.Generic;
using System.Linq;
using System.Text;

namespace TestAttribute
{
    [TestAttribute(Nname = "testbean", Nauthor = "neohope", Ntype = "BEAN", Nmsg = "this is just a message", Nversion = "1.0")]
    class TestBean
    {
        public String name;
        public int age;
        public String sex;
    }
}

3、ClassPathScanner.cs
通过指定assembly名,扫描assembly下所有的类型

using System;
using System.Collections.Generic;
using System.Linq;
using System.Reflection;
using System.Text;

namespace TestAttribute
{
    /// <summary>
    /// The class path scanner
    /// </summary>
    class ClassPathScanner
    {
        /// <summary>
        /// Get all assemblies in current domain <see cref="System.Reflection.Assembly"/>.
        /// </summary>
        /// <returns>string set of assembly name</returns>
        public static String[] FindAllAssembliesInCurrentDomain()
        {
            List<String> result = new List<String>();
            foreach (System.Reflection.Assembly assembly in System.AppDomain.CurrentDomain.GetAssemblies())
            {
                result.Add(assembly.GetName().Name);
            }

            return result.ToArray();
        }

        /// <summary>
        /// Get all module in current assembly
        /// </summary>
        /// <returns>string set of module name</returns>
        public static String[] FindAllModuleInThisAssembly()
        {
            List<String> result = new List<String>();
            //Assembly thisAssembly = this.GetType().Assembly;
            Assembly thisAssembly = System.Reflection.Assembly.GetExecutingAssembly();
            foreach (Module item in thisAssembly.GetModules())
            {
                result.Add(item.Name);
            }

            return result.ToArray();
        }


        /// <summary>
        /// Get all type in current assembly
        /// </summary>
        /// <returns>string set of type name</returns>
        public static String[] FindAllTypeInThisAssembly()
        {
            List<String> result = new List<String>();
            //Assembly thisAssembly = this.GetType().Assembly;
            Assembly thisAssembly = System.Reflection.Assembly.GetExecutingAssembly();
            foreach (Type item in thisAssembly.GetTypes())
            {
                result.Add(item.Name); 
            }

            return result.ToArray();
        }

        /// <summary>
        /// Get all type in the assembly
        /// </summary>
        /// <param name="assemblyName">the name of the assembly</param>
        /// <returns>Type set in the assembly</returns>
        public static Type[] FindAllTypeInAssemblyByName(String assemblyName)
        {
            Assembly theAssembly = null;
            foreach (System.Reflection.Assembly assembly in System.AppDomain.CurrentDomain.GetAssemblies())
            {
                if (assembly.GetName().Name.Equals(assemblyName))
                {
                    theAssembly = assembly;
                    break;
                }
            }
            if (theAssembly == null) return new Type[] { };

            List<Type> result = new List<Type>();
            foreach (Type item in theAssembly.GetTypes())
            {
                result.Add(item);
            }

            return result.ToArray();
        }
    }
}

4、ClassAttributeScanner.cs
工厂类,初始化时,通过attribute过滤bean,并将bean的名称及type放到dictionary中
获取实例时,通过bean名称,获取type,并实例化,返回

using System;
using System.Collections.Generic;
using System.Linq;
using System.Reflection;
using System.Text;

namespace TestAttribute
{
    internal class ClassAttributeScanner
    {
        /// <summary>
        /// Dictionary of bean name and bean class
        /// </summary>
        private static Dictionary<String, Type> beanDict = new Dictionary<string, Type>();

        /// <summary>
        ///  Load all bean class with attribute from package
        /// </summary>
        /// <param name="assemblyName">the name of the assembly</param>
        /// <returns></returns>
        protected static void loadBeanTypes(String assemblyName)
        {
            Type[] allTypes = ClassPathScanner.FindAllTypeInAssemblyByName(assemblyName);
            foreach (Type aType in allTypes)
            {
                Attribute attribute  = (TestAttribute)Attribute.GetCustomAttribute(aType, typeof(TestAttribute));
                if (attribute == null) continue;

                TestAttribute ta = (TestAttribute)attribute;
                String beanName = ta.Nname;
                beanDict[beanName] = aType;
            }
        }

        /// <summary>
        /// init the bean factory
        /// </summary>
        /// <param name="assemblyName">the name of the assembly</param>
        /// <returns></returns>
        public static void InitBeanFactory(String assemblyName)
        {
            loadBeanTypes(assemblyName);
        }

        public static Object GetBean(String beanName)
        {
            Type theType = beanDict[beanName];
            if (theType != null)
            {
                //return theType.Assembly.CreateInstance(theType.FullName); 
                return Activator.CreateInstance(theType);
            }
            else
            {
                return null;
            }
        }
    }
}

5、Program.cs
程序入口

using System;
using System.Collections.Generic;
using System.Linq;
using System.Text;

namespace TestAttribute
{
    class Program
    {
        private static void Main(string[] args)
        {
            //String[] ret = ClassPathScanner.FindAllAssembliesInCurrentDomain();
            //String[] ret = ClassPathScanner.FindAllModuleInThisAssembly();
            //String[] ret = ClassPathScanner.FindAllTypeInThisAssembly();
            //foreach (string s in ret) Console.WriteLine(s);

            ClassAttributeScanner.InitBeanFactory("TestAttribute");
            TestBean bean = (TestBean)ClassAttributeScanner.GetBean("testbean");
            bean.name = "neohope";
        }
    }
}

文章原创,转载请注明出处www.neohope.com

Spring通过注解加载Bean的基本原理浅析(java版)

最近在看spring的源码,想写一系列的文章,来模拟spring的一些最基本功能的实现。
部分源码是从spring中抽取出来的,然后进行了无限的精简,目的是让入门的弟兄们也可以看得很清楚。
首先这第一篇,就是说的spring的IOC功能中,是如何实现通过注解来加载Bean文件的。

文章原创,转载请注明出处www.neohope.com

经过无限精简之后,整体流程为:
1、初始化bean工厂
bean工厂根据配置,加载带有指定annotation的类,并放到了map中
2、从bean工厂获取一个bean
通过bean的id,实例化一个类,并返回

需要的前置知识为:
1、spring的基本知识
2、反射

然后是源码:
1、TestAnnotation.java
这是个注解类,声明了一个新的注解类型,用于表示bean及bean的名字

package com.neohope.annotation.test;

import java.io.File;
import java.io.IOException;
import java.lang.annotation.*;
import java.net.JarURLConnection;
import java.net.URL;
import java.net.URLConnection;
import java.util.Collections;
import java.util.Enumeration;
import java.util.LinkedHashSet;
import java.util.Set;
import java.util.jar.JarEntry;
import java.util.jar.JarFile;

/**
 * Created by Hansen on 2016/3/10.
 */

@Retention(RetentionPolicy.RUNTIME)
@Target(ElementType.TYPE)
@Documented
public @interface TestAnnotation {
    String ntype();
    String nname();
    String nauthor();
    String nversion();
    String nmsg();
}

2、TestBean.java
这是个Bean,使用了注解作为标识,是用于具体加载的类

package com.neohope.annotation.test;

/**
 * Created by Hansen on 2016/3/10.
 */

@TestAnnotation(nauthor = "neohope",nversion="1.0",ntype = "BEAN",nname = "testbean", nmsg = "this is just a message")
public class TestBean {
    public String name;
    public int age;
    public String sex;
}

3、ClassPathScanner.java
从spring中抽取的,类扫描工具类
其作用为,通过指定包名,扫描包名下所有的类
可用于jar文件中类的扫描

package com.neohope.annotation.test;

import java.io.File;
import java.io.IOException;
import java.net.JarURLConnection;
import java.net.URISyntaxException;
import java.net.URL;
import java.net.URLConnection;
import java.util.Collections;
import java.util.Enumeration;
import java.util.LinkedHashSet;
import java.util.Set;
import java.util.jar.JarEntry;
import java.util.jar.JarFile;

/**
 * Created by Hansen on 2016/3/10.
 */
public class ClassPathScanner {

    /**
     * Get all class name in given packageName
     * @param packageName the package name
     * @return the result as String array
     * @throws IOException in case of I/O errors
     * @see #getAllClassFileInPackage
     */
    public static String[] getAllClassNameInPackage(String packageName) throws IOException, URISyntaxException {
        String[] classFiles = getAllClassFileInPackage(packageName);
        Set<String> result = new LinkedHashSet<String>(classFiles.length);
        for(String clazz : classFiles)
        {
            result.add(clazz.replace(".class", "").replace("/", ".").replace("\\", "."));
        }
        return result.toArray(new String[result.size()]);
    }

    /**
     * Get all class files in given packageName
     * @param packageName the package name
     * @return the result as String array
     * @throws IOException in case of I/O errors
     * @see #findAllClassPathByPackageName
     * @see #loadJarClasses
     * @see #loadFileClasses
     */
    protected static String[] getAllClassFileInPackage(String packageName) throws IOException, URISyntaxException {
        if (packageName.startsWith("/")) {
            packageName = packageName.substring(1);
        }
        if (packageName.endsWith("/")) {
            packageName = packageName.substring(0,packageName.length()-1);
        }

        URL[] rootDirResources = findAllClassPathByPackageName(packageName);
        Set<String> result = new LinkedHashSet<String>(16);
        for (URL rootDirResource : rootDirResources) {
            if (rootDirResource.toString().toUpperCase().startsWith("JAR")) {
                result.addAll(loadJarClasses(rootDirResource));
            }
            else {
                String rootEntryPath = rootDirResource.getPath().replace(packageName,"").replace("/",File.separator).substring(1);
                result.addAll(loadFileClasses(rootDirResource,rootEntryPath));
            }
        }

        return result.toArray(new String[result.size()]);
    }

    /**
     * Find all class path with the given packageName via the ClassLoader.
     * @param packageName the absolute path within the classpath
     * @return the result as URL array
     * @throws IOException in case of I/O errors
     * @see java.lang.ClassLoader#getResources
     */
    protected static URL[] findAllClassPathByPackageName(String packageName) throws IOException {
        ClassLoader cl = ClassPathScanner.class.getClassLoader();
        Enumeration<URL> resourceUrls = (cl != null ? cl.getResources(packageName) : ClassLoader.getSystemResources(packageName));
        Set<URL> result = new LinkedHashSet<URL>();
        while (resourceUrls.hasMoreElements()) {
            URL url = resourceUrls.nextElement();
            result.add(url);
        }
        return result.toArray(new URL[result.size()]);
    }

    /**
     * Get all the class file in given class dir
     * @param rootClassDir the root directory
     * @return all the class in rootClassDir
     * @throws IOException if directory contents could not be retrieved
     */
    protected static Set<String> loadFileClasses(URL rootClassDir, String rootEntryPath) throws IOException, URISyntaxException {
        File rootDir;
        rootDir = new File(rootClassDir.toURI());
        if(!rootDir.exists() || !rootDir.isDirectory() || !rootDir.canRead())
        {
            return Collections.emptySet();
        }

        Set<String> result = new LinkedHashSet<String>(8);
        EnumClassFiles(rootDir, rootEntryPath, result);
        return result;
    }

    /**
     * Recursively get all class files in the given dir
     * @param dir the given directory
     * @param result the Set of class names to add to
     * @throws IOException if directory contents could not be retrieved
     */
    protected static void EnumClassFiles(File dir, String rootEntryPath, Set<String> result) throws IOException {
        File[] dirContents = dir.listFiles();
        if (dirContents == null) {
            return;
        }
        for (File content : dirContents) {
            if (content.isDirectory()) {
                if (!content.canRead()) {
                }
                else {
                    EnumClassFiles(content, rootEntryPath, result);
                }
            }
            else {
                if(content.toString().endsWith(".class")) {
                    result.add(content.toString().replace(rootEntryPath, ""));
                }
            }
        }
    }

    /**
     * Get all the class file in given jar path
     * @param jarPath the given jar path
     * @return the Set of matching Resource instances
     * @throws IOException in case of I/O errors
     */
    protected static Set<String> loadJarClasses(URL jarPath)
            throws IOException {
        JarFile jarFile;
        String jarFileUrl;
        String rootEntryPath = "";
        Set<String> result = new LinkedHashSet<String>(8);

        URLConnection connection = jarPath.openConnection();
        if (connection instanceof JarURLConnection) {
            JarURLConnection jarCon = (JarURLConnection) connection;
            jarFile = jarCon.getJarFile();
            jarFileUrl = jarCon.getJarFileURL().toExternalForm();
            JarEntry jarEntry = jarCon.getJarEntry();
            rootEntryPath = (jarEntry != null ? jarEntry.getName() : "");
        } else {
            return Collections.emptySet();
        }

        try {
            for (Enumeration<JarEntry> entries = jarFile.entries(); entries.hasMoreElements(); ) {
                JarEntry entry = entries.nextElement();
                String entryPath = entry.getName();

                if (entryPath.startsWith(rootEntryPath) && entryPath.endsWith(".class")) {
                    result.add(entryPath);
                }
            }

        } catch (Exception ex) {
        }

        return result;
    }

    public static void main(String[] args) throws IOException, URISyntaxException {
        //String[] classes = getAllClassNameInPackage("com/neohope/annotation");
        //String[] classes = getAllClassNameInPackage("org/apache/log4j/config");

        String[] classes = getAllClassNameInPackage("/com/neohope/annotation/");
        //String[] classes = getAllClassNameInPackage("org/apache/log4j/config");
        for(String clazz : classes)
        {
            System.out.println(clazz);
        }
    }
}

4、ClassAnnotationScanner.java
工厂类,初始化时,通过annotation过滤bean,并将bean的名称及class放到map中
获取实例时,通过bean名称,获取class,并实例化,返回

package com.neohope.annotation.test;

import java.io.IOException;
import java.net.URISyntaxException;
import java.util.HashMap;

/**
 * Created by Hansen on 2016/3/10.
 */

public class ClassAnnotationScanner {

    /**
     * HashMap of bean name and bean class
     */
    static HashMap<String, Class> beanMap = new HashMap<String, Class>();

    /**
     * Load all bean class with annotation from package
     * @param packageName the package name
     * @return void
     * @throws IOException in case of I/O errors
     * @throws URISyntaxException in case of URI syntax error
     * @throws ClassNotFoundException in case of class not found
     * @see ClassPathScanner#getAllClassNameInPackage
     */
    protected static void loadBeanClasses(String packageName) throws IOException, URISyntaxException, ClassNotFoundException {
        String[] classes = ClassPathScanner.getAllClassNameInPackage(packageName);
        for(String clazz : classes)
        {
            Class loadedClazz = Class.forName(clazz);
            Object obj  = loadedClazz.getAnnotation(TestAnnotation.class);
            if(obj==null)continue;

            TestAnnotation ta = (TestAnnotation)obj;
            String beanName = ta.nname();
            beanMap.put(beanName,loadedClazz);
        }
    }

    /**
     * init the bean factory
     * @param packageName the package name
     * @return void
     * @throws IOException in case of I/O errors
     * @throws URISyntaxException in case of URI syntax error
     * @throws ClassNotFoundException in case of class not found
     * @see #loadBeanClasses
     */
    public static void initBeanFactory(String packageName) throws IOException, URISyntaxException, ClassNotFoundException {
        loadBeanClasses(packageName);
    }

    /**
     * get bean by bean name
     * @param beanName the bean name
     * @return new object of the bean class
     * @throws IllegalAccessException in case of illegal access
     * @throws InstantiationException in case of instantiation error
     */
    protected static Object getBean(String beanName) throws IllegalAccessException, InstantiationException {
        Class loadedClazz = beanMap.get(beanName);
        if(loadedClazz!=null) {
            return loadedClazz.newInstance();
        }
        else
        {
            return null;
        }
    }

    public static void main(String[] args) throws IOException, URISyntaxException, ClassNotFoundException, InstantiationException, IllegalAccessException {
        initBeanFactory("com/neohope/annotation/");
        TestBean bean = (TestBean)getBean("testbean");
        bean.name = "neohope";
    }

}

文章原创,转载请注明出处www.neohope.com

处理windows控制字符0x17

今天同事遇到了很诡异的问题,就是从数据库中读取一个字段时,有些数据中,会多一个0x17的控制字符。

暂时没太好的处理方法,自己写了个测试例子,仅供参考吧:

for java

    public static void main(String[] args)
    {
        byte[] b= { 0x30, 0x30, 0x1f, 0x37, 0x39, 0x33, 0x39, 0x36, 0x34, 0x31 };
        byte[] bt={0x1f};
        String s1 = new String(b);
        String st= new String(bt);
        String s2 = s1.replace(st,"");
        String s3 = s1.replace((char)0x1f,' ').replace(" ","");
        System.out.println(s1);
        System.out.println(s2);
        System.out.println(s3);
    }

for charp

        static void Main(string[] args)
        {
            Byte[] b = { 0x30, 0x30, 0x1f, 0x37, 0x39, 0x33, 0x39, 0x36, 0x34, 0x31 };
            Byte[] bt = {0x1f};
            String s1 = System.Text.Encoding.Default.GetString(b);
            String st = System.Text.Encoding.Default.GetString(bt);
            String s2 = s1.Replace(st, "");
            String s3 = s1.Replace((char) (0x1F), ' ').Replace(" ", "");
            Console.WriteLine(s1);
            Console.WriteLine(s2);
            Console.WriteLine(s3);
            Console.ReadLine();
        }

使用Dubbo实现RPC简单示例02

简单的Dubbo RPC调用描述如下:
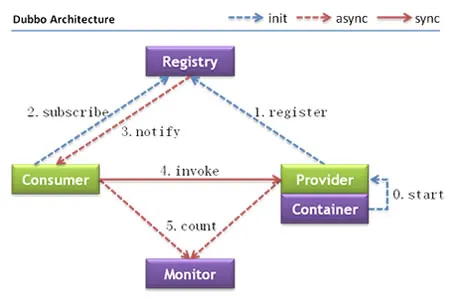
dubbo-arch

复杂的Dubbo RPC调用描述如下:
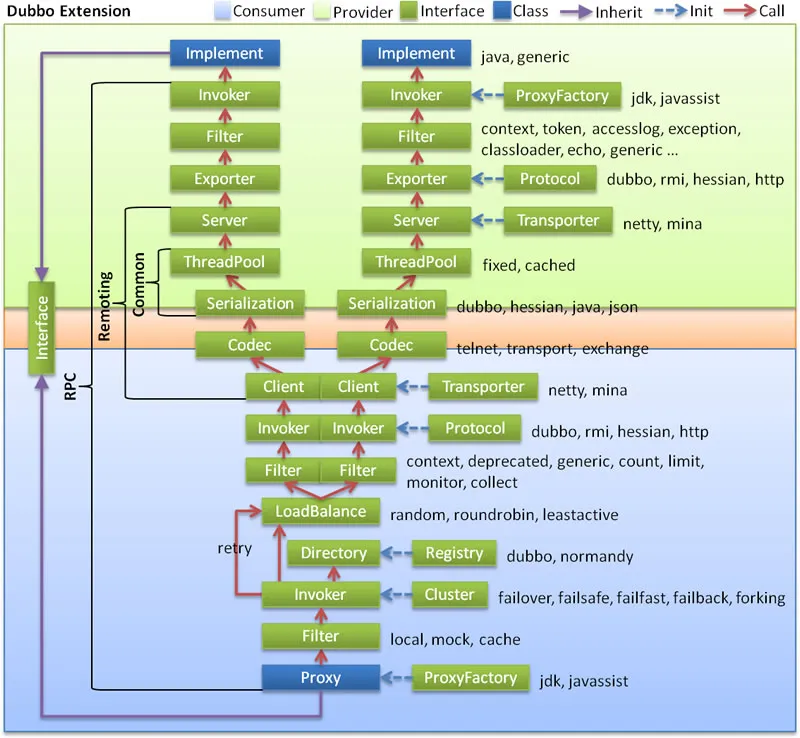
dubbo-arch-ext

在这里我们先用zookeeper来做registry,做一个简单的例子:

一、首先是zookeeper:
1、到zookeeper进行下载
2、解压
3、拷贝conf/zoo_sample.cfg到conf/zoo.cfg,然后按需要修改配置
4、双击bin/zkServer.cmd

二、然后是接口定义,服务端和接口端都会用到,最好打一个jar包,防止错误修改:
IJustATest.java

package com.neohope.dubbo.test;

public interface IJustATest {
    public String SayHelloTo(String name);
    public int Add(int a, int b);
}

三、再就是服务端实现:
1、新建java程序,添加mvn功能,引用dubbo-x.x.x.jar

2、服务实现类MyDubboService.java

package com.neohope.dubbo.test;

public class MyDubboService implements IJustATest{

    public String SayHelloTo(String name) {
        return "Hello " + name;
    }

    public int Add(int a, int b) {
        return a+b;
    }
}

3、服务注册
ServceTest.java

package com.neohope.dubbo.test;

import org.springframework.context.support.ClassPathXmlApplicationContext;

public class ServceTest {
    public static void main(String[] args) throws Exception {
        ClassPathXmlApplicationContext context = new ClassPathXmlApplicationContext(new String[] {"applicationContext.xml"});
        context.start();

        System.in.read();
    }
}

4、spring配置

<?xml version="1.0" encoding="UTF-8"?>

<beans xmlns="http://www.springframework.org/schema/beans"
       xmlns:xsi="http://www.w3.org/2001/XMLSchema-instance"
       xmlns:dubbo="http://code.alibabatech.com/schema/dubbo"
       xsi:schemaLocation="http://www.springframework.org/schema/beans
            http://www.springframework.org/schema/beans/spring-beans.xsd
            http://code.alibabatech.com/schema/dubbo
            http://code.alibabatech.com/schema/dubbo/dubbo.xsd
            ">

    <!-- 具体的实现bean -->
    <bean id="myDubboService" class="com.neohope.dubbo.test.MyDubboService" />

    <!-- 提供方应用信息,用于计算依赖关系 -->
    <dubbo:application name="neo_service_provider"  />

    <!-- 使用zookeeper注册中心暴露服务地址 -->
    <dubbo:registry address="zookeeper://127.0.0.1:2181" />

    <!-- 用dubbo协议在20880端口暴露服务 -->
    <dubbo:protocol name="dubbo" port="20880" />

    <!-- 声明需要暴露的服务接口 -->
    <dubbo:service interface="com.neohope.dubbo.test.IJustATest" ref="myDubboService" />

</beans>

5、编译运行

四、最后是客户端实现:
1、新建java程序,添加mvn功能,引用dubbo-x.x.x.jar

2、服务调用
ServceTest.java

package com.neohope.dubbo.test;

import org.springframework.context.support.ClassPathXmlApplicationContext;

public class ClientTest {
    public static void main(String[] args) throws Exception {
        ClassPathXmlApplicationContext context = new ClassPathXmlApplicationContext(new String[]{"applicationContext.xml"});
        context.start();

        IJustATest proxy = (IJustATest) context.getBean("myDubboService");
        System.out.println(proxy.SayHelloTo("neohope")) ;
        System.out.println(proxy.Add(1,2)) ;

        System.in.read();
    }
}

3、spring配置

<?xml version="1.0" encoding="UTF-8"?>
<beans xmlns="http://www.springframework.org/schema/beans"
       xmlns:xsi="http://www.w3.org/2001/XMLSchema-instance"
       xmlns:dubbo="http://code.alibabatech.com/schema/dubbo"
       xsi:schemaLocation="http://www.springframework.org/schema/beans
            http://www.springframework.org/schema/beans/spring-beans.xsd  
            http://code.alibabatech.com/schema/dubbo  
            http://code.alibabatech.com/schema/dubbo/dubbo.xsd  
            ">

    <!-- 消费方应用名,用于计算依赖关系,不是匹配条件,不要与提供方一样 -->
    <dubbo:application name="neo_service_consumer" />

    <!-- 使用zookeeper注册中心暴露服务地址 -->
    <dubbo:registry address="zookeeper://127.0.0.1:2181" />

    <!-- 生成远程服务代理,可以像使用本地bean一样使用demoService -->
    <dubbo:reference id="myDubboService" interface="com.neohope.dubbo.test.IJustATest" />

</beans>

4、编译运行

使用Dubbo实现RPC简单示例01

由于需要用到dubbo-admin,所以直接下载源码进行编译的

1、到github下载源码
dubbo

2、用mvn生成eclipse工程

mvn eclipse:eclipse

3、导入后,进行编译
如果不是为了看代码方便,直接mvn编译也不错哦

4、将spring版本从2升级到3,我用的是3.2.16.RELEASE
如果考虑到后面的dubbo-admin的话,可以使用citrus-webx-all-3.1.6的相同版本,3.2.7.RELEASE

	<properties>
		<spring_version>3.2.16.RELEASE</spring_version>
	</properties>
	<dependencyManagement>
		<dependencies>
			<dependency>
				<groupId>org.springframework</groupId>
				<artifactId>spring-context</artifactId>
				<version>${spring_version}</version>
			</dependency>
		</dependencies>
	</dependencyManagement>

5、准备将netty3升级到netty4,发现API差距太大,只好后面再搞了哦

6、dubbo-addmin要修改一下依赖

<!--升级citrus-webx-all到3.1.6,但不要升级到3.2.x版本,一堆的错-->
<dependency>
	<groupId>com.alibaba.citrus</groupId>
	<artifactId>citrus-webx-all</artifactId>
	<version>3.1.6</version>
</dependency>

<!--添加依赖包-->
<dependency>
        <groupId>org.apache.velocity</groupId>
        <artifactId>velocity</artifactId>
        <version>1.7</version>
</dependency>

<!--如果你和我一样,用的spring版本与citrus-webx-all不一致,要手工排除一套spring依赖包-->

7、这样就全部编译通过了哦

8、后面准备手工merge一下dubbox的部分代码,可惜他们也没能升级netty4

浅析SOA框架演化

说到SOA的兴起,已经是几年前的事情咯。

按我的理解,SOA框架的演化,主要按四条路来进行的:

第一条路,就是从CORBA衍生,可以作为CORBA的替代品。
这一条路上,典型代表为ICE、Thrift,Avro,ProtocolBuffer+GRPC
其典型行为是,定义idl,对每种语言提供编译器及运行库,然后提供RPC调用功能

第二条路,就是语言框架需要
这一条路上,主要代表为DCOM,EJB,DUBBO,最初目的都是为了给语言框架提供更好的分布式功能。
其典型行为是,语言或框架本身不具备改功能,对其进行了扩展。自身对原语言框架依赖比较严重。

第三条路,就是HTTP中新规范的出现
这一条路上,主要代表为SOAP,REST。
其典型行为是,每种语言都有多种实现,定义schema,每种语言会有多种库支持,最后通过HTTP通讯进行调用

第四条路,就是功能整合
这一条路上,主要代表为WCF,各类ESB产品
其典型特征为:提供多种SOA解决方案

具体使用的时候,其实大家可以看到,这些框架都是万变不离其宗。
那就是,都需要接口描述语言(无论是IDL、WSDL还是什么),都提供良好的支持功能开发较为简单,都是SOA框架解决通讯问题,对于开发人员透明。
大家具体使用是,根据实际情况选取即可。